Must Have Craft Supplies

For those of you who are unaware, I'm in the process of cleaning & organizing my craft room. Let's just say, it's been an adventure. Although I have a whoooole lotta stuff, some people may want to know, what do you need to get started? After all, not everyone ends up with a whole room full of craft supplies overnight, right? To help all you aspiring crafters, I've created this list of my must-have craft supplies, along with a FREE printable you can download and take with you to the craft store! This way, you can start your post-apocolyptic craft bunker too ;)

Creating your Crafting Arsenal

Ok, way back in March of 2017, I told you how to be efficient to get all our crafts projects done in time. Now, let's talk about the supplies we need to do them! Here are some of my favorite, must-have items in your craft stash.

Starting a craft stash? Click to find out my must-have items for crafters of any skill level, plus some tips to save money and to rock a DIY party!

1. Glue Gun 2. Jewelry Tools 3. Cricut Explore Air 4. Paper Cutter 5. Circle, Heart, Star Paper Punches 6. E6000 Glue and Photosafe Glue Stick 7. Glue Gun Caddy 8. Mini Iron 9. Small Scissors and Large Scissors 10. Washi Tape 11. Paper Roll 12. Self-Healing Cutting Mat 13. Fringe Scissors 14. Craft Caddy 15. Paintbrushes and Paint Tray

1. Glue Gun- this one needs no explanation, but I'll give you one. Glue guns are handy for almost everything! They're good for craft projects, sure, but you can also use them for temporary fixes, party decor, etc. I've used it on nearly every project I've done, including my Pineapple Garland, Snowcone Party Hats, and Cotton Candy Garland. I guarantee if you buy one, you'll find a reason to use it. So, go get one!

2. Jewelry Tools- I purchased these for making jewelry once upon a time, but they're just handy to have around. I've used them for several crafts projects already on the blog, like my KS Inspired Bracelets and Wood Bead Tassel Necklace, but they're also good for cutting fake flowers and even for fixing your own jewelry when it breaks! Unlike regular tools, these are smaller, so they're better for tiny objects and precise fixes.

3. Cricut Explore Air- I resisted buying a Cricut for a while, but it's so handy to have! I used it for the Rapunzel lanterns at my Disney Themed Engagement Party, for my sister's Halloween costume, and for my Mean Girls Conversation Hearts. I'll probably be using it for my wedding too! It cuts a whole bunch of materials as well, not just paper and vinyl! It's an investment for sure, but I think it's really fun to have.

4. Paper Cutter- This little gadget is perfect for cutting a straight line. It's great for making banners and cutting out Printables from the internet. I've used it for my TGIF 90's Themed Slumber Party and my Nautical Notecard Birthday Banner. It's easy to use and small to store. Remember those giant paper cutters we had in school that looked like a guillotine? This is a much smaller, safer version of that. 

5. Paper Punches (Circle, Heart, Star)-  These punches are great to have on hand if you need to spruce up a project. So far I've used them on my Nautical Notecard Birthday Banner and Rock Candy Christmas Trees. They're easy to use and small, so they're easy to store!

6. E6000 Glue and Photosafe Glue Stick - E6000 is my second favorite glue, after glue guns. It adheres to nearly everything! It's a little smelly, so you need to use it with a window open, but it's great. I've used it for my DIY Dollar Store Candy Jars, my Zebra Party Tray and my Circus Animal Drink Stirrers. The photo safe glue stick is great for scrapbooking projects, making cards, and making collages! I used them for my DIY 90' Pun Valentines.

7. Glue Gun Caddy- I actually found this product while creating this blog post, and HAD to buy it. It holds your (hot!) glue gun, glue sticks, and protects your table. It's amazing! Never again will you be holding your half glued project mid-air while trying to remember where you left your glue sticks!

8. Mini Iron- A mini iron is great for small craft or sewing projects. I used it for my Mean Girls Conversation Hearts, the eye masks in my TGIF 90's Themed Slumber Party, and for touching up a wrinkly tablecloth on my Glam Friendsgiving Dinner. It's perfect for iron-ons!

9. Small Scissors and Large Scissors- I love that these scissors are so dang cute. Can we start with that?! I don't need to tell you why scissors are handy, so I'll just say that these small ones are great for when you need to do something precise, like making tassels, since they have pointed blades. These larger ones are great for cutting pieces of paper, cardboard, or other large things that require a straight line. I've used them in nearly every blog post, but they were especially useful for my Cotton Candy Garland and Rock Candy Christmas Trees.

10. Washi Tape- Washi tape has so many fun uses! It's great for temporarily sticking things together, for spicing up a project, or even organizing your planner! I used it to paint my beads for my Wood Bead Tassel Necklace, and it was super handy.

11. Paper Roll- This paper roll is great to avoid making a mess. You just need to pull a sheet long enough to cover your workspace to keep it clean. Ever dripped paint on your desk, or written with a marker that bleeds? This will help prevent them from staining! Sure, you can use newspapers but that means that 1. if you take photos of your project it won't look clean and neat, and 2. you'll have to find the newspapers. I highly recommend having this on hand!

12. Self-Healing Cutting Mat- This is one of my newest purchases. I haven't really used it yet (except as a really pretty backdrop for some craft projects) but it's got a ruler, which is great for measuring projects while working on them. It's also really thick and reversible, so you get twice the use and durability! Plus, the pink is SO much fun.

13. Fringe Scissors- Back when I made my Mini Faux Pintatas, I didn't have a pair of these scissors and I regretted it. They're so handy for making pinatas, fringe, and shredding up paper. It has 5 blades, so it makes more cuts and gets your project done faster! Again, VERY good for when you're making multiple projects at once!

14. Craft Caddy- A craft caddy is great for holding all your supplies and keeping them organized. I highly recommend having a spot that you use to store everything so that you can find it when you need it. There have been so many times that I lost my glue sticks, my paintbrushes, or my paper punches when I needed them. These crafting supplies are only useful when you can actually find and use them (duh). So, be sure to find a place where they can all stay together, like one big happy crafting family.

15. Paintbrushes and Paint Tray- These paintbrushes have a variety of uses! It's great to have multiple sizes so that you can do broad strokes quickly, but also have a nice thin one when you need to be more detailed. I really should invest in a new paint palette because mine is old and full of dried paint ("invest" = probably $3!) but paint palettes are really useful for pouring out just a little bit of paint or mixing colors. I've used paintbrushes on so many projects, including my DIY Donut Party Platter, my Colorful Leaf Garland, and my Circus Animal Drink Stirrers.

How to avoid going broke on craft supplies

I know what you're thinking- craft supplies can be expensive! I recommend adding a few items at a time, or using coupons! Michael's has plenty of sales and coupons you can use. There's also stores like A.C. Moore, Jo-Ann Fabric & Crafts, and Hobby Lobby. If you want to save even more, your local dollar store and even Walmart has a huge craft selection for cheap! Target also has some craft supplies, but not as many as Walmart. However, Target has some really CUTE stuff! Start small and keep adding more over time. Your crafting empire wasn't built in a day, right?

Do you already have a craft stash? What's in it? What can you NOT live without? I think for me, it's my glue gun. I even have one at work! Let me know your faves in the comments below.
Bridesmaid Brunch Craft Party Ideas

Let's get real here: wedding planning isn't exactly as glamorous as you imaged it to be. There are a lot of moving parts, tons of decisions to be made, and a whole lot of DIYs you want to try. Planning a wedding kind of becomes a part time job, except you're spending money instead of making it. So, rather than spending your weeknights filled with tears crafting 100+ favors, why not invite your friends or bridesmaids over for a fun crafternoon?! You can pop a bottle of rose, have some finger foods, and take bets on who's going to cry during the ceremony (like your Aunt Bertha, who cries over everything). 

Wedding planning got you down? Take a (short) break and invite your friends over for a crafting brunch party! It's super affordable with Oriental Trading. Click the photo to learn more!

Since you're already spending a ton on wedding related things, I know what you're thinking. You don’t need one extra thing to spend a ton of cash on. Well, fear not my friends! Oriental Trading is your party headquarters, and everything is SO affordable! With their new Marry Me section, you'll find all their wedding-worthy supplies in one place, for a great low price. They've got everything you need for the bridal shower, the ceremony, reception, and more! The options are seriously limitless, and there are tons of ideas under many of their products, showing you how to use them.

*Note: This post is a collaboration with Oriental Trading, but all opinions are my own. My love affair with them started way back when I first got their catalogs as a kid!

Wedding planning got you down? Take a (short) break and invite your friends over for a crafting brunch party! It's super affordable with Oriental Trading. Click the photo to learn more!

Think about how much time you’ll save by having your friends join you in crafting, and how much fun it’ll be! During a time of intense stress and worry, you need a break to hang with your girls and laugh. Plus, it'll be a nice way to say "thank you" if you've been a little bit of a grumpy bridezilla lately. 

Table Setup

Wedding planning got you down? Take a (short) break and invite your friends over for a crafting brunch party! It's super affordable with Oriental Trading. Click the photo to learn more!

To set up the table, I stuck with a simple white (disposable) tablecloth. Since crafting can get messy, I added a table runner using easel paper to catch any spills. I gave each person a place setting for snacking, which was cute and colorful! I started with a square gold dot plastic dessert plate as sort of a charger, topped with a hot pink plate for a pop of color. Each person gets a set of gorgeous gold utensils and a hot pink napkin to keep things tidy, as well as a paint palette for their watercolors.

Wedding planning got you down? Take a (short) break and invite your friends over for a crafting brunch party! It's super affordable with Oriental Trading. Click the photo to learn more!

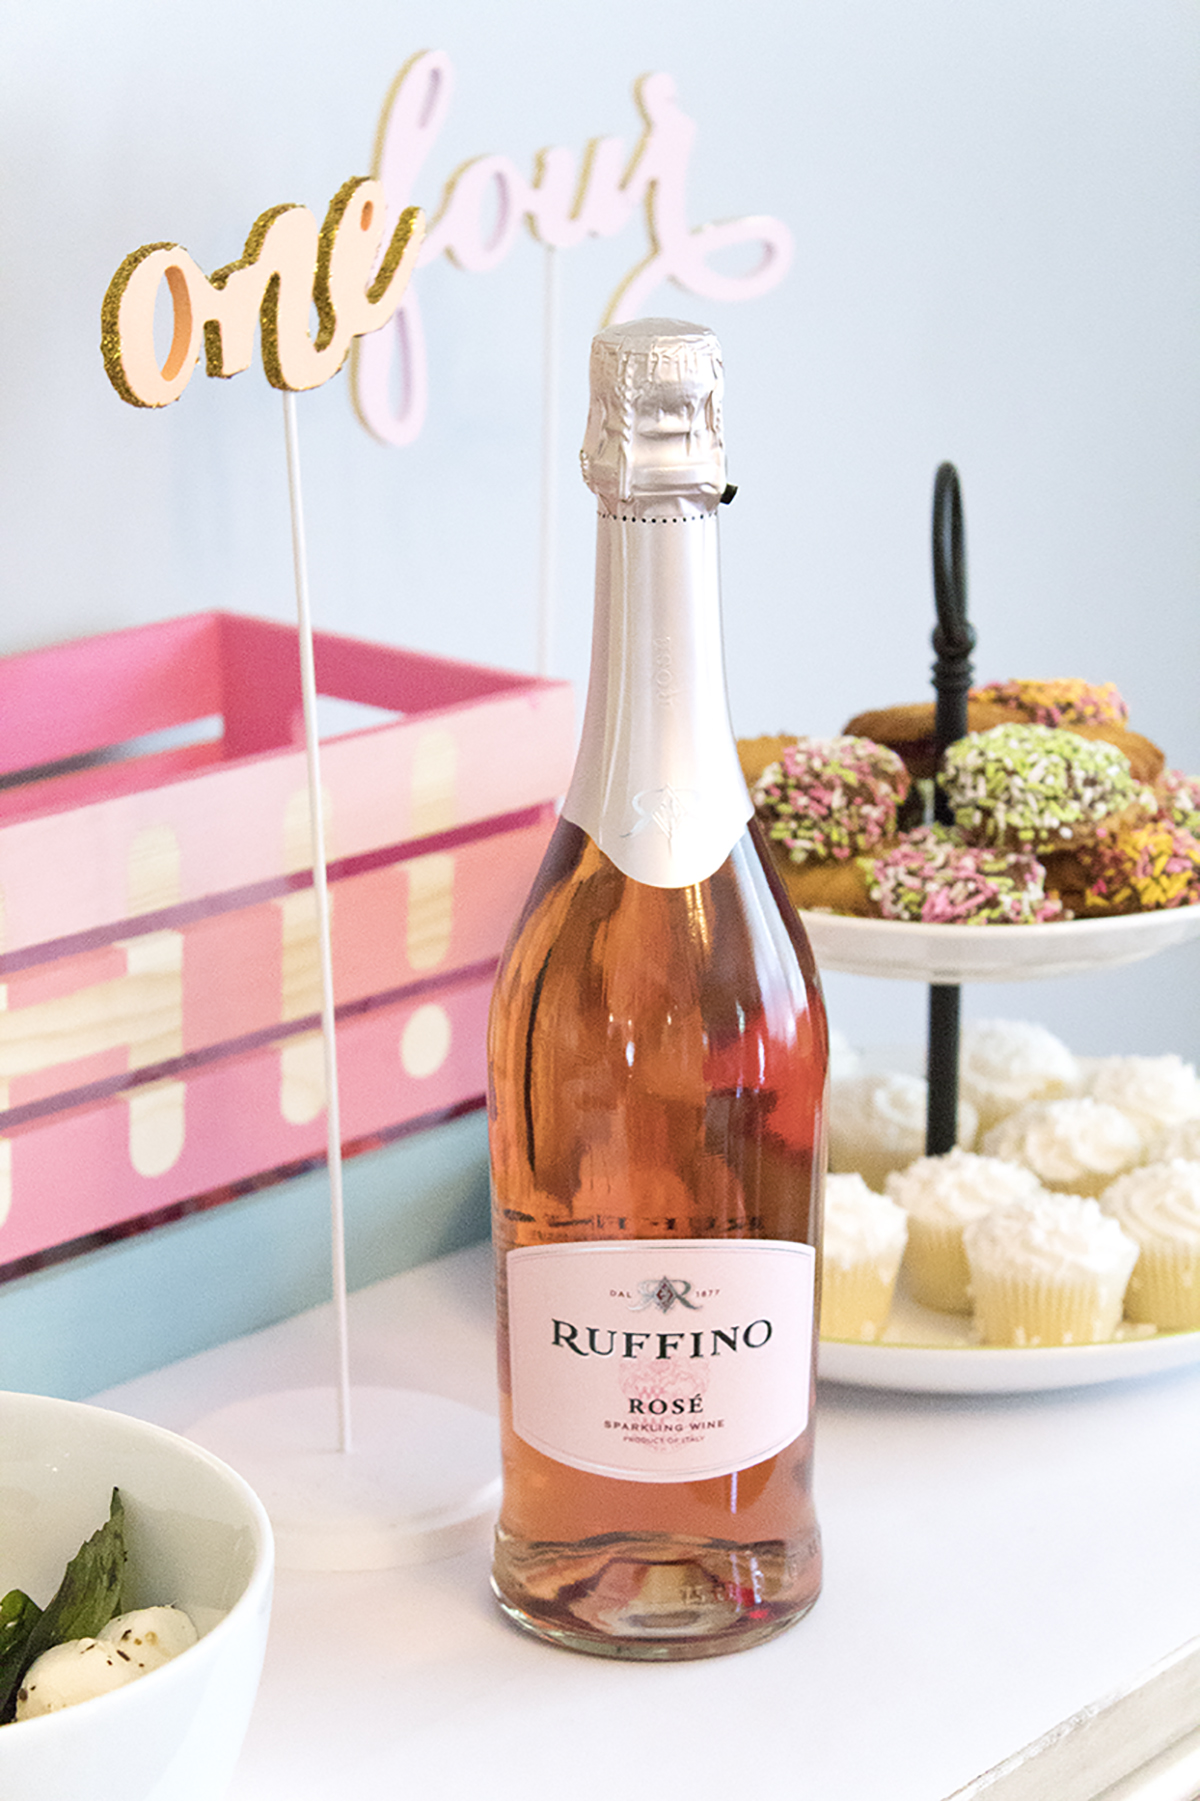
Everything is more fun with a glass of wine, so each gal gets a really cute purple wine glass for her rose with a gold striped strawClear cupcake stands put the jordan almonds on a pedestal, making it easier for everyone to reach them. 

Wedding planning got you down? Take a (short) break and invite your friends over for a crafting brunch party! It's super affordable with Oriental Trading. Click the photo to learn more!

I kept the rest of the decorations simple by propping up my Pop Fizz Clink sign from my Disney-Themed Backyard Engagement Party. Finger foods and small desserts finish up the fun. P.S.- the white easel paper would be the perfect backdrop for using colorful sharpies to label what's what!

Wedding planning got you down? Take a (short) break and invite your friends over for a crafting brunch party! It's super affordable with Oriental Trading. Click the photo to learn more!

 The Crafts

A few weeks ago, I showed you 3 fun projects you can make using Oriental Trading products to add a pop of color to your wedding. These projects are perfect to make with your besties or bridesmaids!

Jordan Almonds

Place all your almonds in decorative bowls with a spoon for easy scooping. Keep your tulle, ribbon, and charms nearby so that it's easy for everyone to assemble. I also recommend pre-cutting the ribbon to ensure that it's all uniform and to prevent waste. The full DIY is here.

Wedding planning got you down? Take a (short) break and invite your friends over for a crafting brunch party! It's super affordable with Oriental Trading. Click the photo to learn more!


Table Numbers

Have your friends help out by painting the table numbers. I did about 3 coats on each one, so it's definitely time consuming! I recommend enlisting an especially crafty friend for the glitter and/or gold foil. It can get complicated and messy, so you definitely want someone precise to handle it! The full DIY is here.

Wedding planning got you down? Take a (short) break and invite your friends over for a crafting brunch party! It's super affordable with Oriental Trading. Click the photo to learn more!


Watercolor Escort Cards

When you get all your friends together, you've got to do this super fun project! It's seriously easy and best of all, really fun!

Looking for an easy and affordable way to guide people to their seats? This.is.it! The full how-to is on the blog, along with ideas on how to get your bridesmaids to help! Click the photo to learn more.

You will need:

Watercolor Paints (here)
Paintbrushes (similar here)
Paint Palette (here)
White Place Cards (here)
Gold Sharpie (here)

Looking for an easy and affordable way to guide people to their seats? This.is.it! The full how-to is on the blog, along with ideas on how to get your bridesmaids to help! Click the photo to learn more.

Each gal will get a set of watercolor paintbrushes, as well as a paint palette. Grab your watercolor paints and your white place cards and give each card a unique look. I added layers of complimentary colors for variation, but it still looks cohesive.

Looking for an easy and affordable way to guide people to their seats? This.is.it! The full how-to is on the blog, along with ideas on how to get your bridesmaids to help! Click the photo to learn more.

Once they're all dry, use a gold sharpie to add a name and a table number to guide people to their seats in style. Write the names in script, or make it fancy with some faux calligraphy!

Looking for an easy and affordable way to guide people to their seats? This.is.it! The full how-to is on the blog, along with ideas on how to get your bridesmaids to help! Click the photo to learn more.

I did the script freehand, but I think if you either got someone to do calligraphy, picked a friend with fancy handwriting, or printed the names on the cards, it would look even better! Be sure to make some extras, as you're bound to mess up a few of them while writing.

Looking for an easy and affordable way to guide people to their seats? This.is.it! The full how-to is on the blog, along with ideas on how to get your bridesmaids to help! Click the photo to learn more.

Woo! I'm not sure about you guys, but a bridesmaid crafternoon brunch party seems like exactly what I need to get over these pre-wedding blues! A few laughs does everyone a world of good. Be sure to check out Oriental Trading's new Marry Me section for everything you'll need for this party, the bridal shower, the wedding, and beyond! 

What's been the hardest part of wedding planning for you? For me, it's been the fact that my mom, sister, and friends live kinda far away, so I've been doing it (cue Eric Carmen) all by myyyseeelllfff. I wish I had them to help/laugh/decide on things. How about you? Let me know in the comments below!

How to Rock Your DIY Party Projects

You know how it goes. You're planning a party and have spent hours scouring the internet for the best ideas. You've got a whole list of projects and you're determined to throw the very best party anyone has ever seen. Ever! But, by the time party day comes around, you are scrambling. What happened between that day you were planning and had "so much time!" and today? Probably all the DIY projects you didn't leave yourself enough time for! Although these DIY projects may seem easy, they can be very time consuming, especially when you're doing several of them. Here are some tips to ensure you have the DIY party of your dreams!

Planning a DIY party? Read my top tips to avoid last minute speedbumps, plus my favorite craft items- and how to save money on them! Click to learn more. #diyparty #partyplanning #diyprojects

Divide them up.

Pick 1-2 must-do projects, 2-3 like-to-do projects and 1-2 if-I-have-time projects. This way, you can do as many projects as you have time for without sacrificing the projects you want to do most. 

Have a crafting party.

If you want to make a lot of projects and have crafty friends, invite them over! Be sure you have all the supplies on hand, then get some snacks, a bottle of wine, and start crafting. You can make more projects in a fraction of the time. Plus, it's a fun bonding experience! 

Learn to delegate.

Ok, maybe you're not the best cake decorator. Instead of trying to do it yourself (and possibly failing), how about having a friend assist? Ask around and see if anyone can come take on some tasks. They'll probably enjoy it! Just be sure to give them a deadline and follow up to make sure it gets done. The last thing you need is to be left scrambling on party day!

Don't leave it until the last minute.

The best thing you can have when it comes to DIY projects is time. Leave a few weeks to work on your projects to ensure they come out nicely and get done in time. Believe me when I tell you that things can take longer than you think!

Maximize your time.

To get the most out of your time spent crafting, try to make as many of each project as you can per session. This way you won't end up taking supplies in and out or wasting paint, etc. You'll also get into the rhythm of it, and be able to make them much faster than if you start and stop, making 2 projects at a time.

Slow and steady wins the race.

On that same note, don't wait until you have a large block of time to start on projects. If all you have are short periods of downtime, use them! It's better to work on 1-2 items per day than trying to rush everything into one day, right? I always love to pop on my favorite movie or TV show, grab a TV table, and whip up some crafts projects while I watch TV.

Create an assembly line.

Sometimes it's easier to batch your projects- aka doing "like" projects at the same time. What does this mean? Painting all your beads at once, cutting out all your shapes in one sitting, or gluing everything together. This will help you to find the most efficient way to do each step through repetition. 

Don't be a perfectionist.

Yes, you want this project to come out perfectly. But does it have to? If you spend too much time perfecting each project, you'll be missing out on valuable time you could be spending on other projects! This is especially important when you have others helping. Allow yourself to delegate and don't spend time micromanaging everyone. It's supposed to be fun! 

Reduce shopping time.

Create a shopping checklist so that you can avoid multiple trips to the store. A quick way to derail your productivity is to stop midway because you forgot something you needed. Been there... done that!

Free printable craft-2.png

Have you ever attempted a DIY party project at the last minute, and then realized you were in WAY over your head? Let me know in the comments below!